| Python Exemplary |
GSM, SMS, EMAIL
![]()
The source code of all examples can be downloaded from here.
GSM - The wireless door to the world |
|
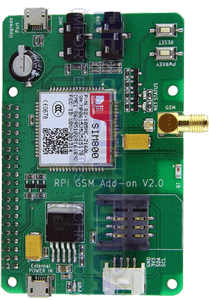
If your Raspberry Pi needs to communicate with the outside world when it is not in the range of a WiFi access point, a digital cellular network may be used. Like with mobile phones you need a SIM card and a subscription from any provider. In most applications only SMS or data transmission with little data volume and low transfer speed is needed, so you may purchase a cheap "data only" SIM card. On the hardware side you need a GSM module, also called GSM modem, that can be interfaced with the Raspberry Pi. Most modems uses a serial (RS-232) communication link and the good old (extended) Hayes command set, with the "AT" prefix. This chapter is based on the SIM800 chip that is very versatile and available on several modules. Since it needs a 4.3V power supply, check that the board includes a voltage regulator, so it can be powered with an external 5V USB power supply.
Remarks: You must remove the SIM lock before you can use it in the modem. To do so, insert the SIM card into any smartphone you have at hand and apply the specific setup option for the SIM lock removal (mostly found under "SIM Security"). You may also ask your network carrier to do it for you. Check that the smartphone starts without asking the code any more. |
|
|
Experiment 1: Raspberry Pi as a SMS butler |
|
The SIM800 opens you the world for a many interesting communication projects. Some of them may be very useful and professional. Let you inspire and invent something special. In the following example the Raspberry Pi communicates via SMS. Aim: You may use a PuTTY terminal to play with the SMS commands manually. Do the following:
If the Raspberry Pi receives an SMS containing the text "getStatus", it sends an SMS with current time stamp and state of GPIO pin #24 to a certain phone number. Program:[►] Program: # SIMSMS1.py import RPi.GPIO as GPIO import serial import time, sys import datetime P_BUTTON = 24 # Button, adapt to your wiring def setup(): GPIO.setmode(GPIO.BOARD) GPIO.setup(P_BUTTON, GPIO.IN, GPIO.PUD_UP) SERIAL_PORT = "/dev/ttyAMA0" # Raspberry Pi 2 #SERIAL_PORT = "/dev/ttyS0" # Raspberry Pi 3 ser = serial.Serial(SERIAL_PORT, baudrate = 9600, timeout = 5) setup() ser.write("AT+CMGF=1\r") # set to text mode time.sleep(3) ser.write('AT+CMGDA="DEL ALL"\r') # delete all SMS time.sleep(3) reply = ser.read(ser.inWaiting()) # Clean buf print "Listening for incomming SMS..." while True: reply = ser.read(ser.inWaiting()) if reply != "": ser.write("AT+CMGR=1\r") time.sleep(3) reply = ser.read(ser.inWaiting()) print "SMS received. Content:" print reply if "getStatus" in reply: t = str(datetime.datetime.now()) if GPIO.input(P_BUTTON) == GPIO.HIGH: state = "Button released" else: state = "Button pressed" ser.write('AT+CMGS="+41764331356"\r') time.sleep(3) msg = "Sending status at " + t + ":--" + state print "Sending SMS with status info:" + msg ser.write(msg + chr(26)) time.sleep(3) ser.write('AT+CMGDA="DEL ALL"\r') # delete all time.sleep(3) ser.read(ser.inWaiting()) # Clear buf time.sleep(5) Remarks: If the time stamp is not correct, consult the tutorial Timer to see how to setup the system clock. |
|
|
Experiment 2: Sending data to a TCP server over GSM |
The server must be made visible from the Internet as described above, either by using the dotted IP address of the router or the IP alias provided by no-ip. Aim: Program:[►] # DataServer3.py from tcpcom import TCPServer IP_PORT = 22000 def onStateChanged(state, msg): if state == "LISTENING": print "Server:-- Listening..." elif state == "CONNECTED": print "Server:-- Connected to", msg elif state == "MESSAGE": print "Server:-- Message received:", msg server = TCPServer(IP_PORT, stateChanged = onStateChanged) The modem implements a multitude of AT commands. By studying the following example, you will learn how to use the modem as a TCP client. (More information of how to use TCP the mode is found here.) As shown above, it is recommended to install a terminal emulator such as PuTTY that you use with an attached display or a VPN access. Then you try out the AT commands manually before implementing them in a program. After starting the emulator type AT<cr> to check if the modem replies OK. Then you type some other AT commands you take from the command set documentation (use ^H to delete a wrong character entry). To start an Internet connection, the following commands may help:
Attention should be paid that your program and PuTTY is not accessing the modem at the same time, because PuTTY swallowns the modem replies. But sometimes it is convenient to see in the terminal window what your program sends and hDafür sieht man aber im Terminalfenster, was das Programm tatsächlich sendet. As usual we structure the code by writing a module SIM800Modem.py that defines modem specific functions. To get the modem's reply, we check with n = ser.inWaiting() the number of characters waiting in the reply buffer and fetch them all together with ser.read(n), where ser is the serial port instance returned when the serial port is opened with serial.Serial() Program:[►] #SIM800Modem.py import RPi.GPIO as GPIO import time VERBOSE = False P_POWER = 11 # Power pin P_RESET = 12 # Reset pin def debug(text): if VERBOSE: print "Debug:---", text def resetModem(): GPIO.setmode(GPIO.BOARD) GPIO.setup(P_RESET, GPIO.OUT) GPIO.output(P_RESET, GPIO.LOW) time.sleep(0.5) GPIO.output(P_RESET, GPIO.HIGH) time.sleep(0.5) GPIO.output(P_RESET, GPIO.LOW) time.sleep(3) def togglePower(): GPIO.setmode(GPIO.BOARD) GPIO.setup(P_POWER, GPIO.OUT) GPIO.output(P_POWER, GPIO.LOW) time.sleep(0.5) GPIO.output(P_POWER, GPIO.HIGH) time.sleep(3) GPIO.output(P_POWER, GPIO.LOW) def isReady(ser): # Resetting to defaults cmd = 'ATZ\r' debug("Cmd: " + cmd) ser.write(cmd) time.sleep(2) reply = ser.read(ser.inWaiting()) time.sleep(8) # Wait until connected to net return ("OK" in reply) def connectGSM(ser, apn): # Login to APN, no userid/password needed cmd = 'AT+CSTT="' + apn + '"\r' debug("Cmd: " + cmd) ser.write(cmd) time.sleep(3) # Bringing up network cmd = "AT+CIICR\r" debug("Cmd: " + cmd) ser.write(cmd) time.sleep(5) # Getting IP address cmd = "AT+CIFSR\r" debug("Cmd: " + cmd) ser.write(cmd) time.sleep(3) # Returning all messages from modem reply = ser.read(ser.inWaiting()) debug("connectGSM() retured:\n" + reply) return reply def connectTCP(ser, host, port): cmd = 'AT+CIPSTART="TCP","' + host + '","' + str(port) + '"\r' ser.write(cmd) time.sleep(5) reply = ser.read(ser.inWaiting()) debug("connctTCP() retured:\n" + reply) return reply def sendHTTPRequest(ser, host, request): ser.write("AT+CIPSEND\r") time.sleep(2) request = "GET " + request + " HTTP/1.1\r\nHost: " + host + "\r\n\r\n" ser.write(request + chr(26)) # data<^Z> time.sleep(2) def closeTCP(ser, showResponse = False): ser.write("AT+CIPCLOSE=1\r") reply = ser.read(ser.inWaiting()) debug("closeTCP() retured:\n" + reply) if showResponse: print "Server reponse:\n" + reply[(reply.index("SEND OK") + 9):] time.sleep(2) def getIPStatus(ser): cmd = "AT+CIPSTATUS\n" ser.write(cmd) time.sleep(1) reply = ser.read(ser.inWaiting()) return reply Remarks: As you see, quite a bit of of know-how and practical experiences is needed to write these lines of code. It is important to note that adequate delays between several actions are necessary, because the program is very fast and it must wait until the modem or the GSM net fulfilled the command. But this is dangerous coding because the required time delays may vary depending on unforeseeable retardations. A better solution would be to stay in a loop until the modem answers with a success message. There is another possible improvement: When a command reports a failure or a timeout, the whole action should not be abandoned completely, but tried again. These improvements blow up the code considerably and therefore not considered here. You may set the flag VERBOSE = True to obtain lot of debugging messages that helps you to debug the code. Aim: Program:[►] # SIMClient.py import serial import time, sys from SIM800Modem import * import RPi.GPIO as GPIO APN = "gprs.swisscom.ch" #HOST = "5.149.19.125" HOST = "raspibrick.zapto.org" PORT = 5000 SERIAL_PORT = "/dev/ttyAMA0" # Raspberry Pi 2 #SERIAL_PORT = "/dev/ttyS0" # Raspberry Pi 3 P_BUTTON = 24 # adapt to your wiring def setup(): GPIO.setmode(GPIO.BOARD) GPIO.setup(P_BUTTON, GPIO.IN, GPIO.PUD_UP) setup() print "Resetting modem..." resetModem() ser = serial.Serial(SERIAL_PORT, baudrate = 9600, timeout = 5) if not isReady(ser): print "Modem not ready." sys.exit(0) print "Connecting to GSM net..." connectGSM(ser, APN) print "Connecting to TCP server..." reply = connectTCP(ser, HOST, PORT) if "CONNECT OK" not in reply: print "Connection failed" sys.exit(0) print "Connection established. Sending data..." while True: if GPIO.input(P_BUTTON) == GPIO.LOW: msg = "Button pressed" else: msg = "Button released" k = len(msg) # do not exceed value returned by AT+CIPSEND? (max 1460) ser.write("AT+CIPSEND=" + str(k) +"\r") # fixed length sending time.sleep(1) # wait for prompt ser.write(msg) time.sleep(4) Remarks: As explained in the chapter Data Communication the client must know the IP address of your PC server as seen from the Internet. Because your router is setup for IP forwarding, the PC is seen as having the IP address of the router. |

|
|
Experiment 3: Sending Emails with attachments |
|
Email is another communication channel to report information and alerts from the Raspberry Pi. You may even attach a large image file taken from the camera. If connected to the Internet via WLAN, mails are sent by your personal SMTP server. You can create an email account with a free email service provider, e.g. a GMail account (you must enable "access for less secure apps" to make it work). Aim: In the following program we use one of our Gmail accounts. Program:[►] # SendMail1.py import RPi.GPIO as GPIO import smtplib, datetime, os, time from email.mime.multipart import MIMEMultipart from email.mime.text import MIMEText from email.mime.image import MIMEImage USERNAME = 'raspi4kids@gmail.com' # Username for authentication PASSWORD = 'raspi1234' # Password for authentication SMTP_SERVER = 'smtp.gmail.com' # URL of SMTP server FROM = "Aegidius Pluess" # Name shown as sender TO = 'a2015@pluess.name' # Mail address of the recipient SSL_PORT = 465 P_BUTTON = 24 # Button pin, adapt to your wiring def setup(): GPIO.setmode(GPIO.BOARD) GPIO.setup(P_BUTTON, GPIO.IN, GPIO.PUD_UP) def sendMail(subject, text, img = None): print("Sending the mail...") msg = MIMEMultipart("alternative") msg.attach(MIMEText(text, "html")) tmpmsg = msg msg = MIMEMultipart() msg.attach(tmpmsg) if img != None: if not os.path.exists(img): print "File", img, "does not exist." else: fp = open(img, 'rb') img = MIMEImage(fp.read()) # included in mail, not as attachment fp.close() msg.attach(img) msg['Subject'] = subject msg['From'] = FROM server = smtplib.SMTP_SSL(SMTP_SERVER, SSL_PORT) server.login(USERNAME, PASSWORD) server.sendmail(FROM, [TO], msg.as_string()) server.quit() print("Mail successfully sent.") setup() print "Waiting for button event..." while True: if GPIO.input(P_BUTTON) == GPIO.LOW: t = str(datetime.datetime.now()) text = "Alert on " + t + "<br>Button was <b>pressed!</b>" subject = "Alert from Raspberry Pi" sendMail(subject, text) #sendMail(subject, text, "c:/scratch/mailtest.png") time.sleep(30) Remarks: The function sendMail() is somewhat tricky and not explained in details here. You can append a mail attachment by specifying the parameter img. The same function can be used to send emails from a Python program running on a PC.
|